Night Sight in Venice Travel
Hey Internet! I just spent a couple days in Venice, Italy celebrating my first anniversary with my wonderful girlfriend. We spent much of our time getting away from the packed main streets and enjoying some really fresh and tasty Italian food.
Staying on the island overnight was a much quieter experience. Once the sun went down and the tourists started leaving for the mainland, the alleys opened up and I started snapping some more photos on my first-generation Pixel XL :)
In order to get better photos at night I used Night Sight, and for comparison's sake I also took a standard HDR+ photo of each scene. All of these photos were taken freehanded (and after a glass of wine). I've included the sensor timing and sensitivity values from Google Photos.
You can click and drag on each photo to compare the two different modes. Alternatively, I've provided buttons to swap between the modes all at once. This is the first time I'm posting Night Sight comparisons, so if you have any feedback on how this is put together, let me know!
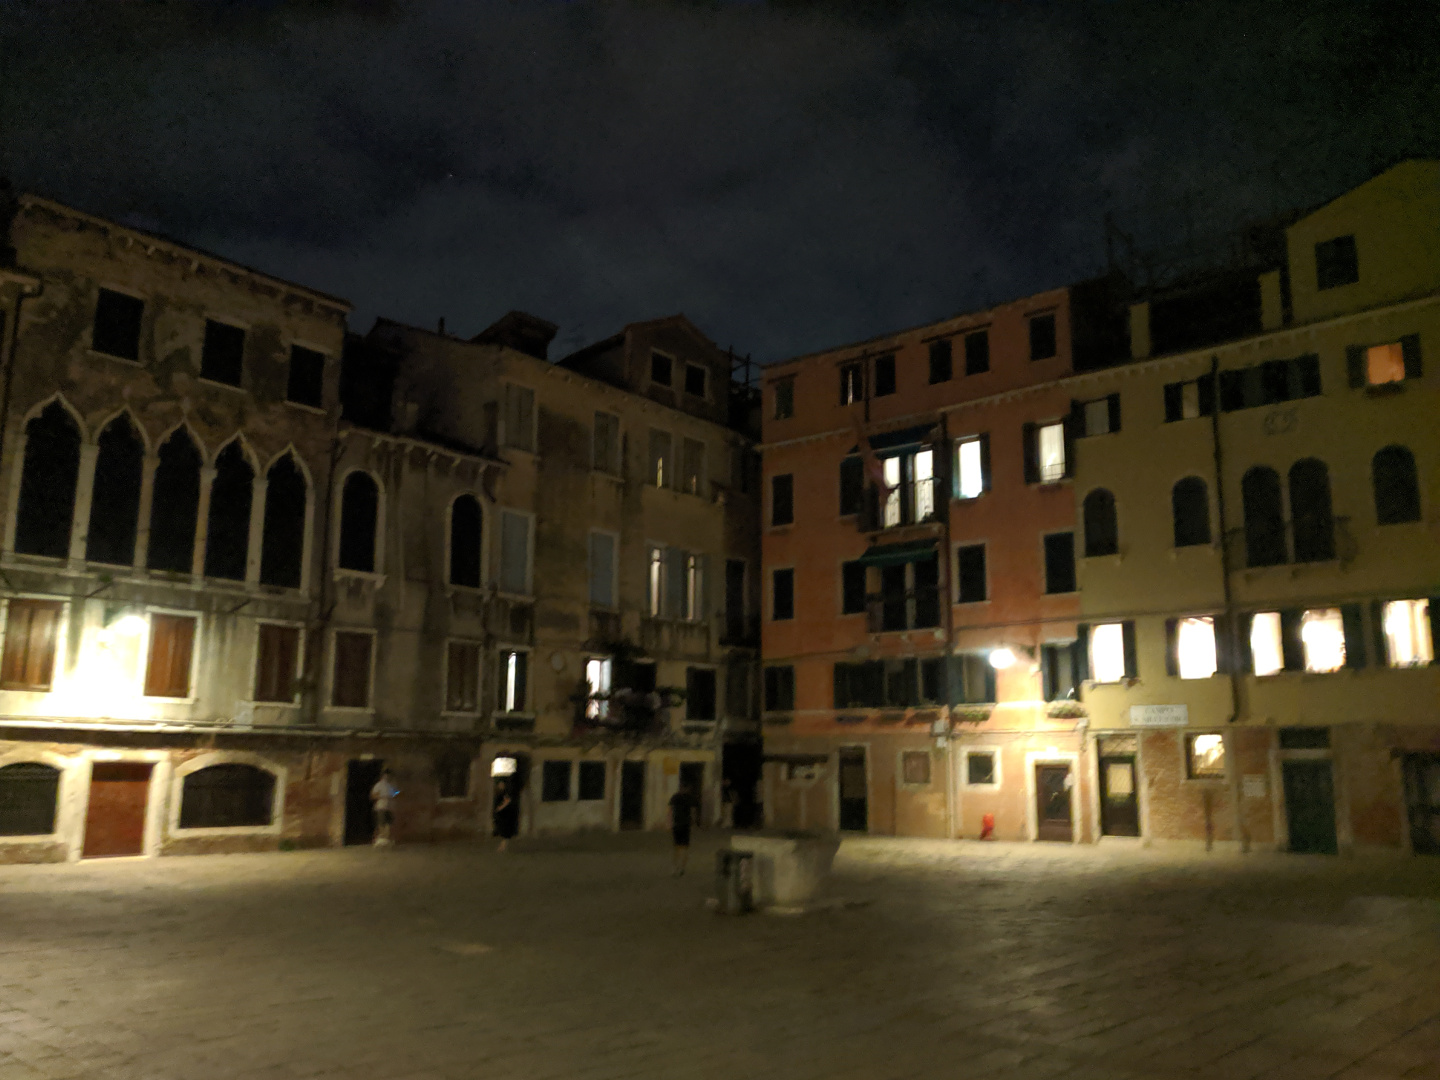
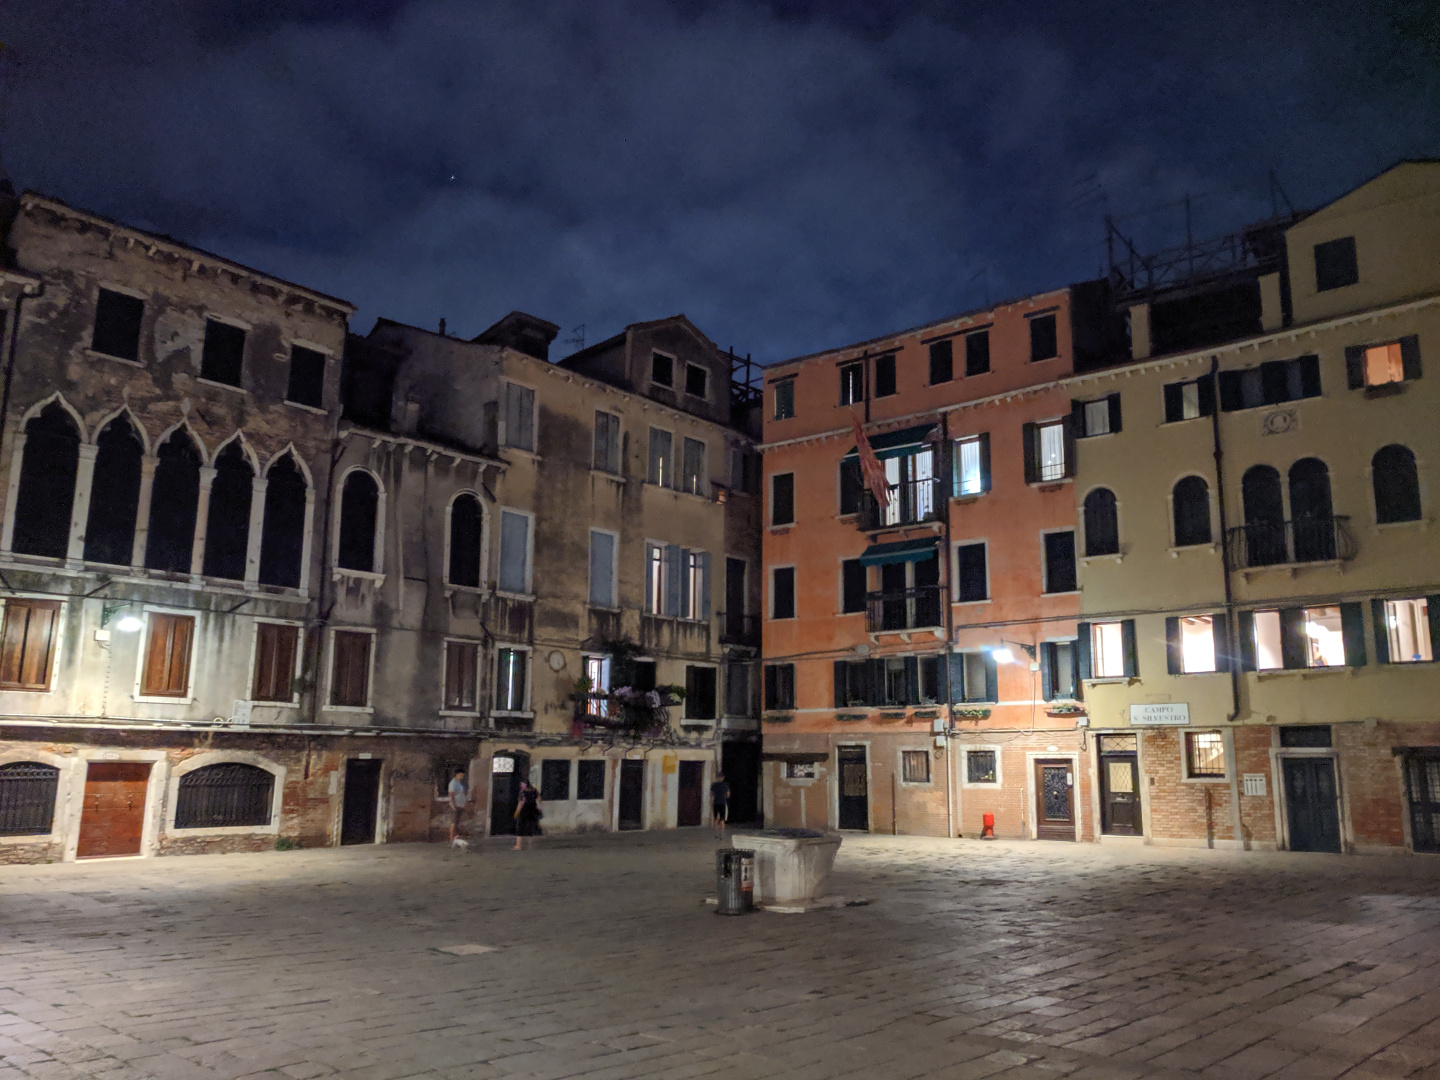
This Plaza has some direct lighting, which got overexposed in Auto mode in order to capture the rest of the frame. Night Sight evened out the lighting more than I expected, making the lamps more of an accent. The cloudy sky also got some more detail and brightness to really balance the shot.
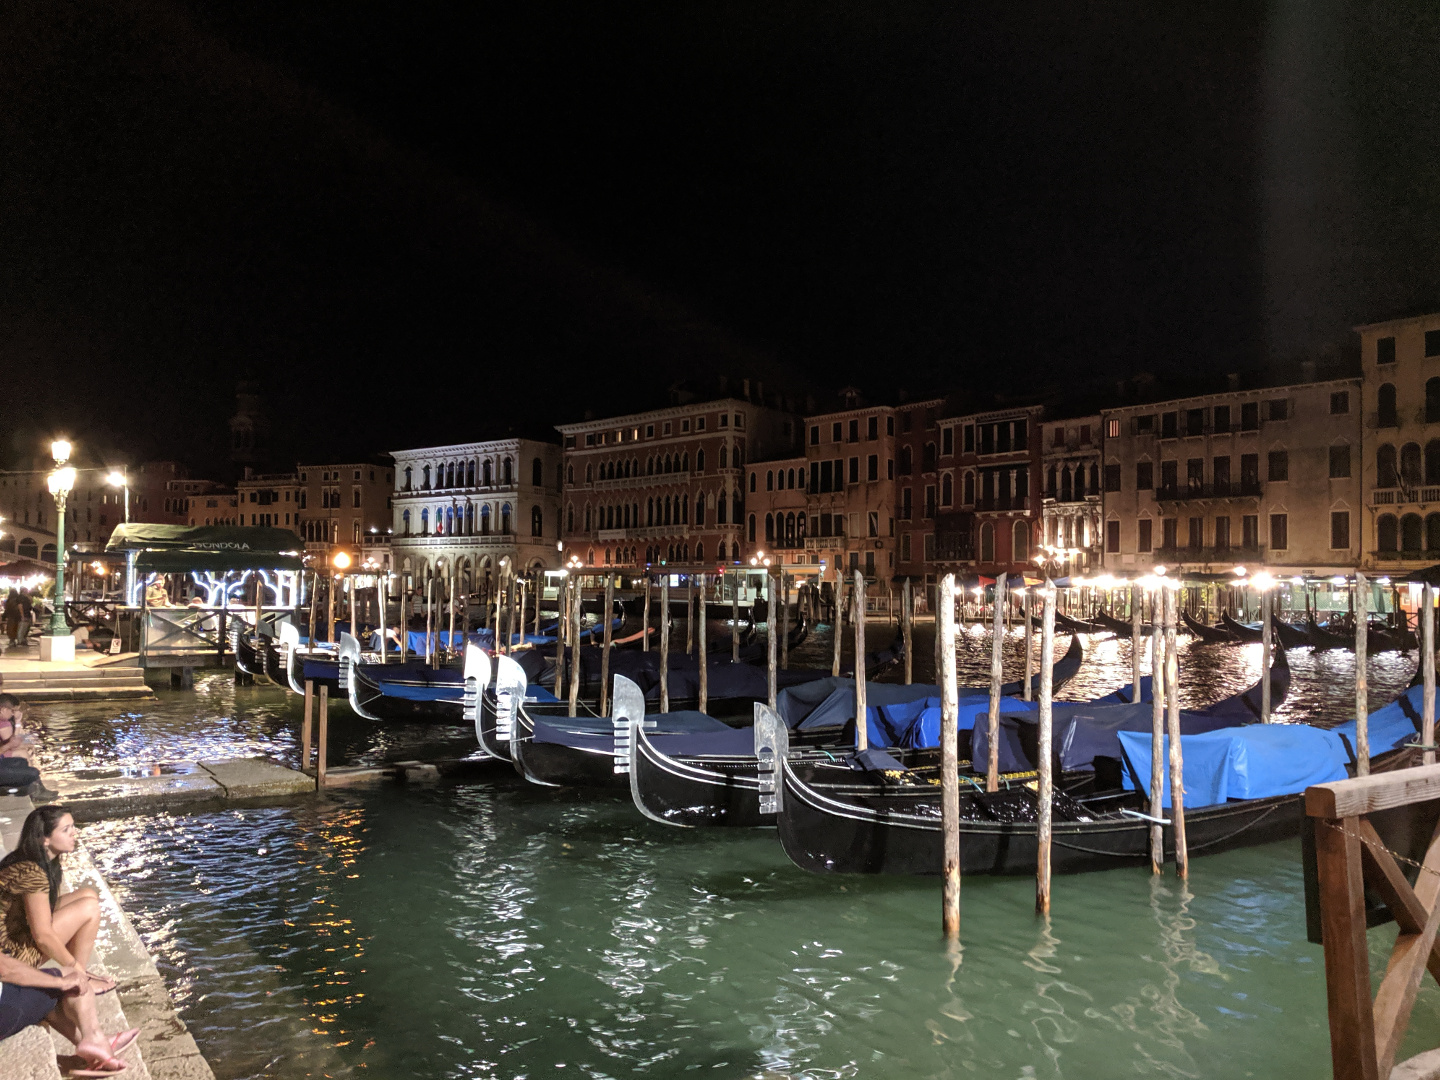
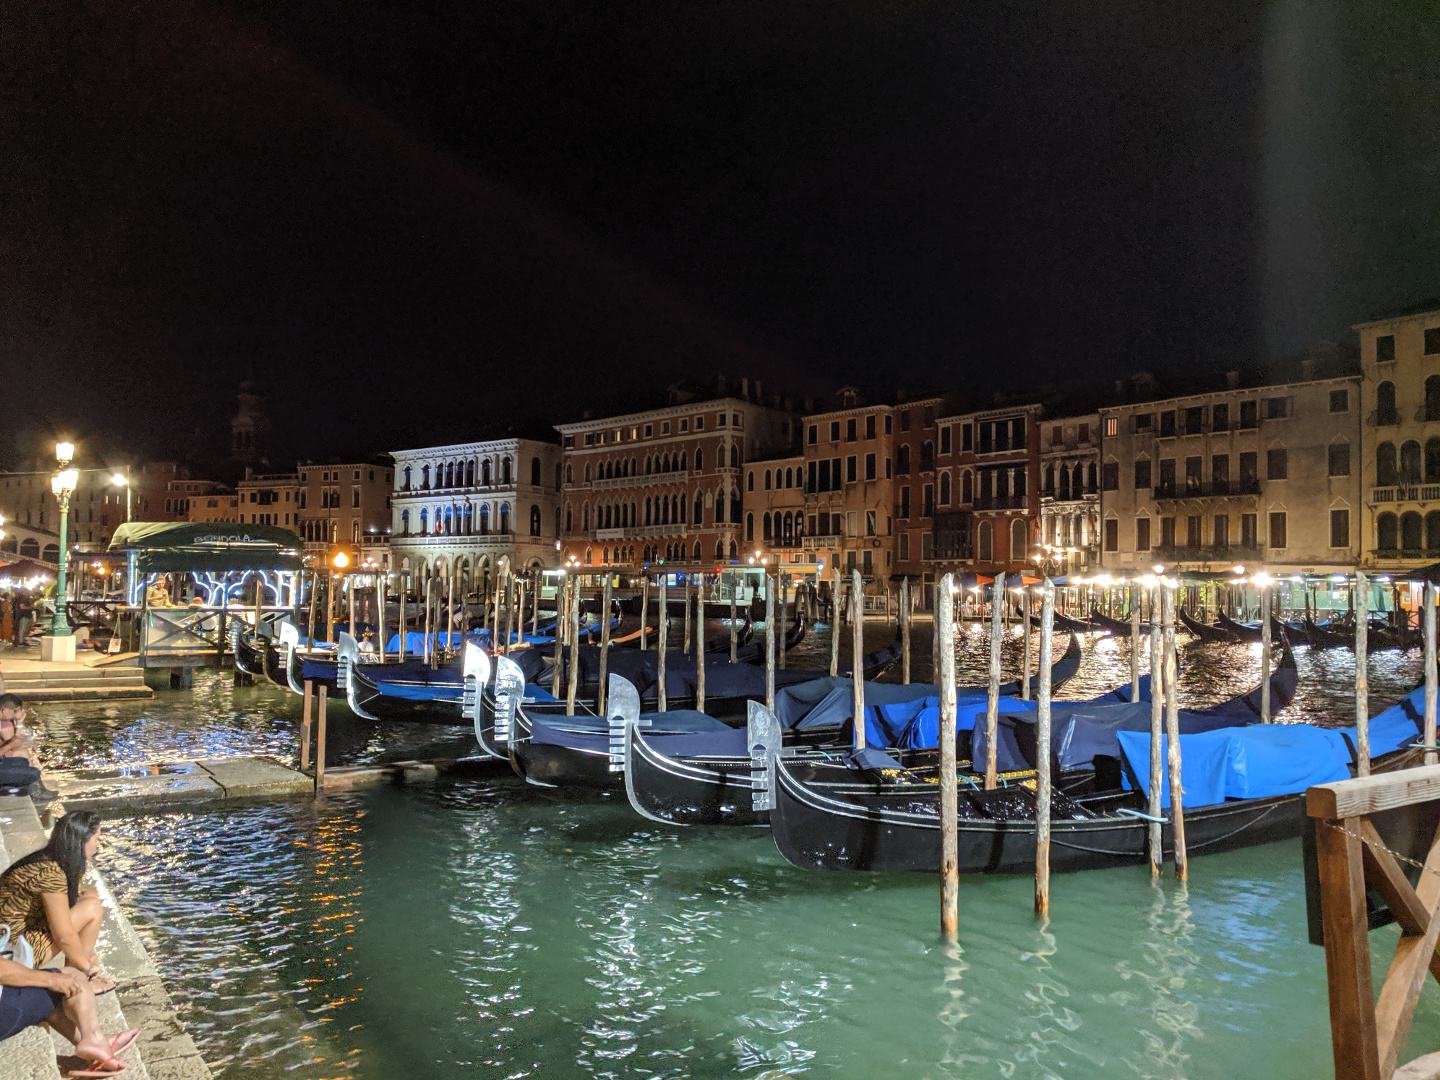
The Grand Canal here is actually lit quite well already. Night Sight still found room to make changes to the color of the Gondolas—particularly the metal accents—and the water. The buildings in the background have better brightness as well, but Night Sight didn't bother taking enough frames in this case to really light them up.
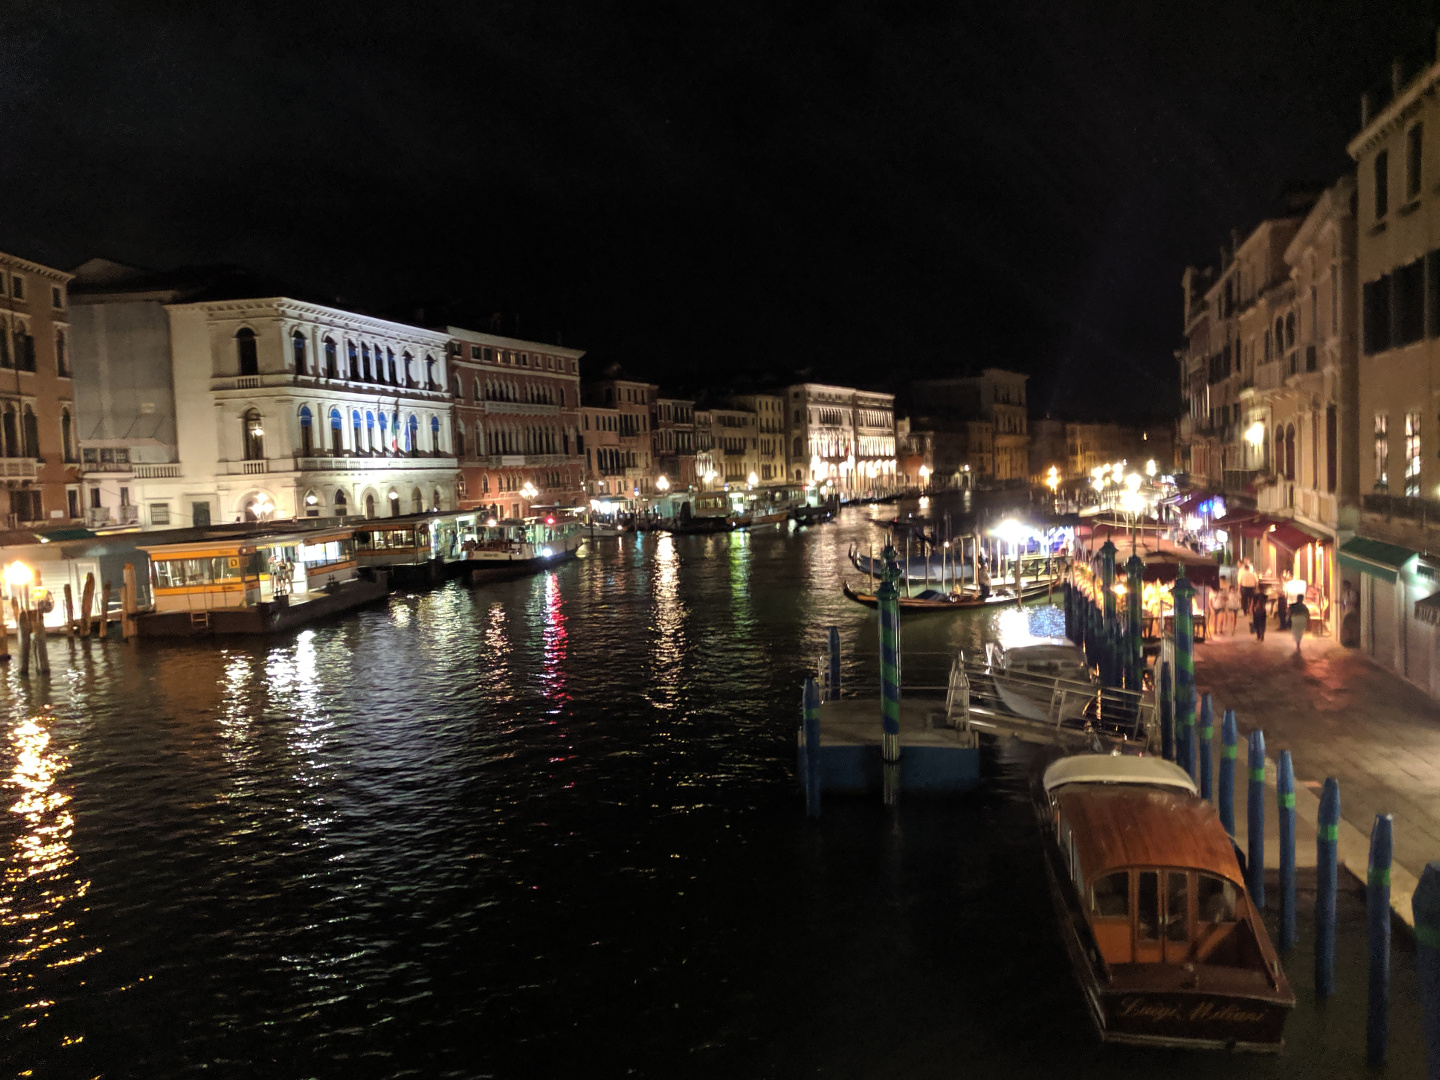

The Grand Canal from Rialto Bridge, while still bright, has less foreground objects, which let Night Sight open up a bit on the buildings. Check out the all-white palace on the left, which is badly light in Auto and cleaned up in post, and the other white building to the right which is effectively overexposed in Auto. The whole lineup is much more cohesive in Night Sight. However, to the right of the image some glare gets added that didn't show up in Auto.
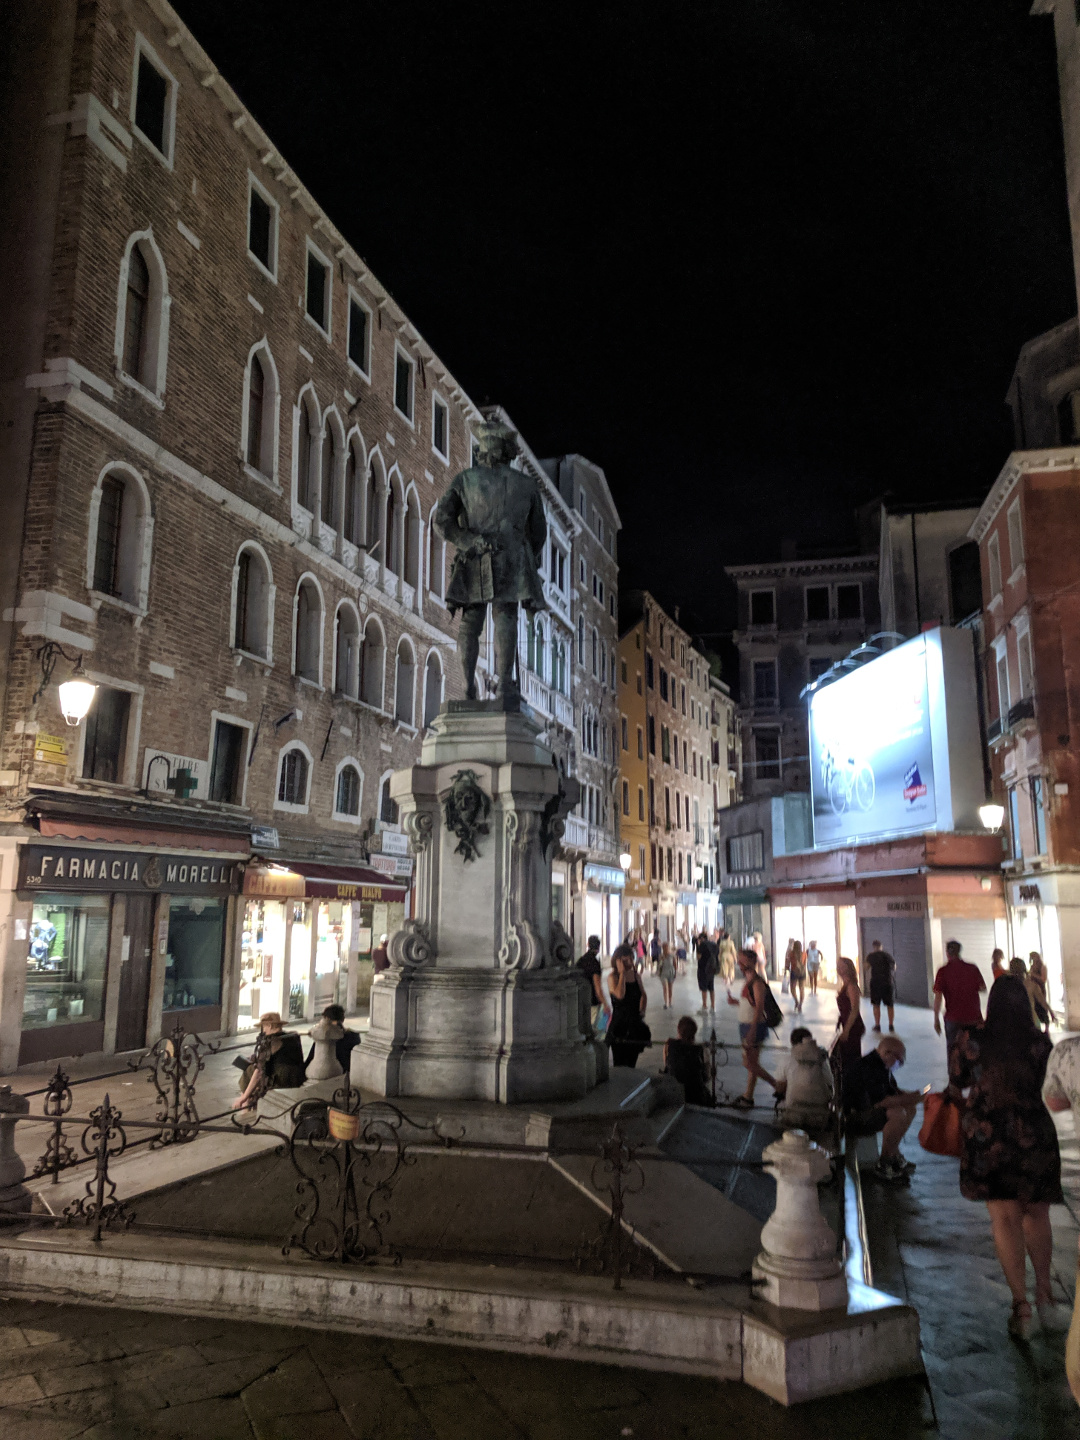
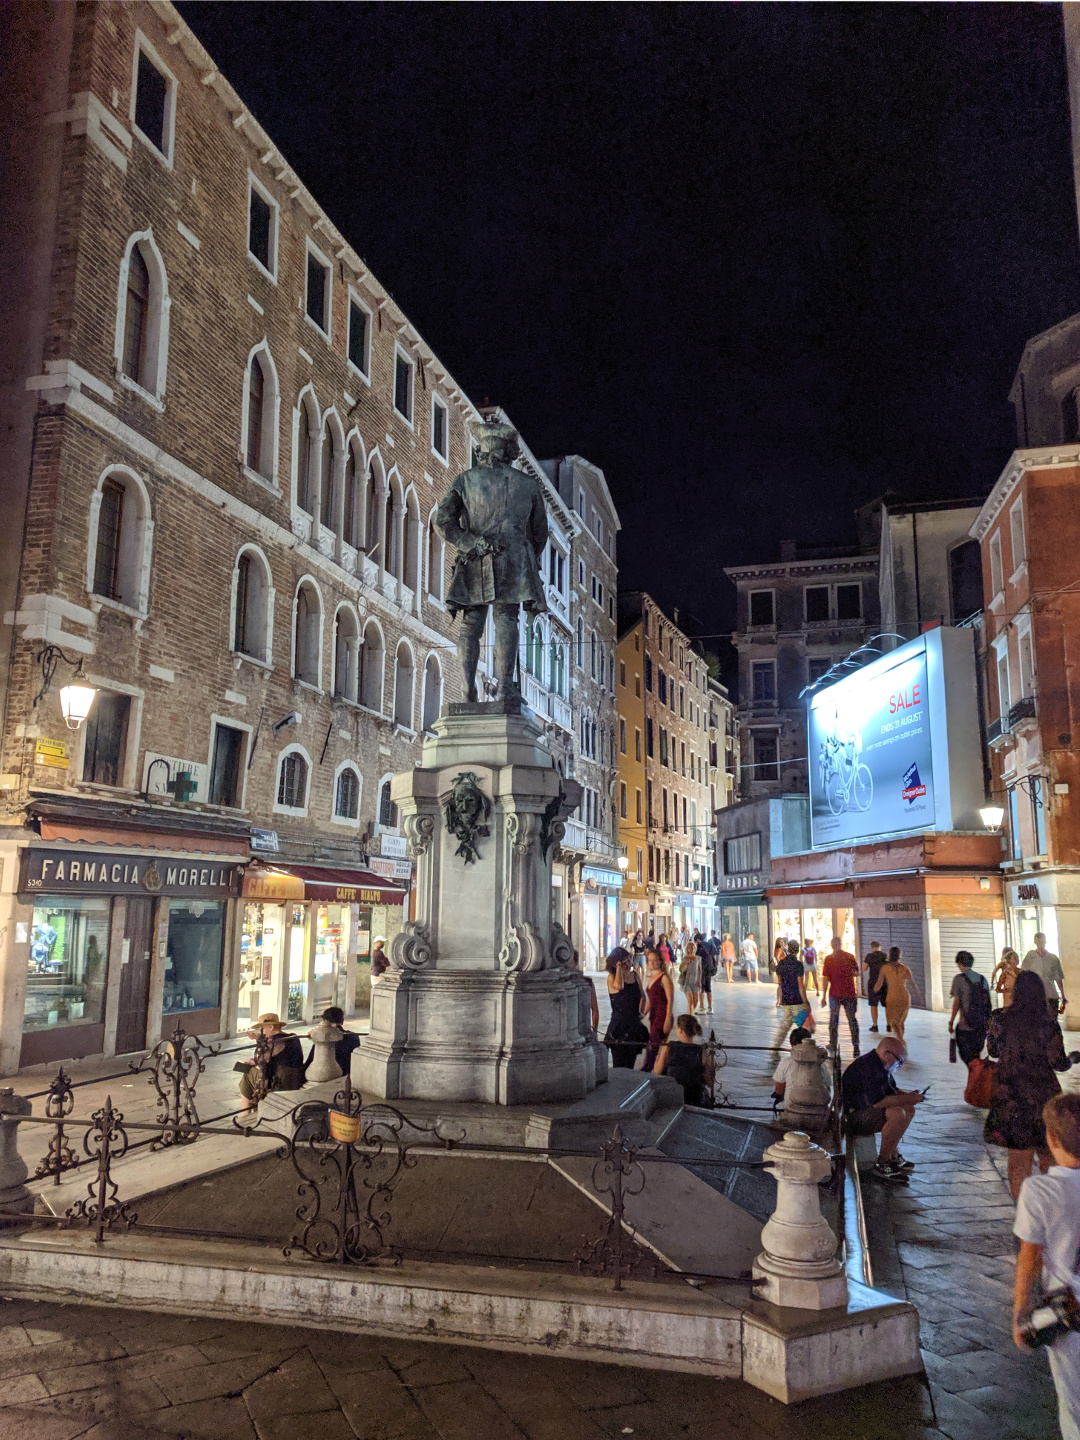
Overall there isn't a huge difference in this shot of a lit-up plaza. The most notable bit is how much more of the billboard on the right is visible. Night Sight fails to render the entire ad, though. (Also a surprising amount of people for how late it was. This was the most people I saw all night)
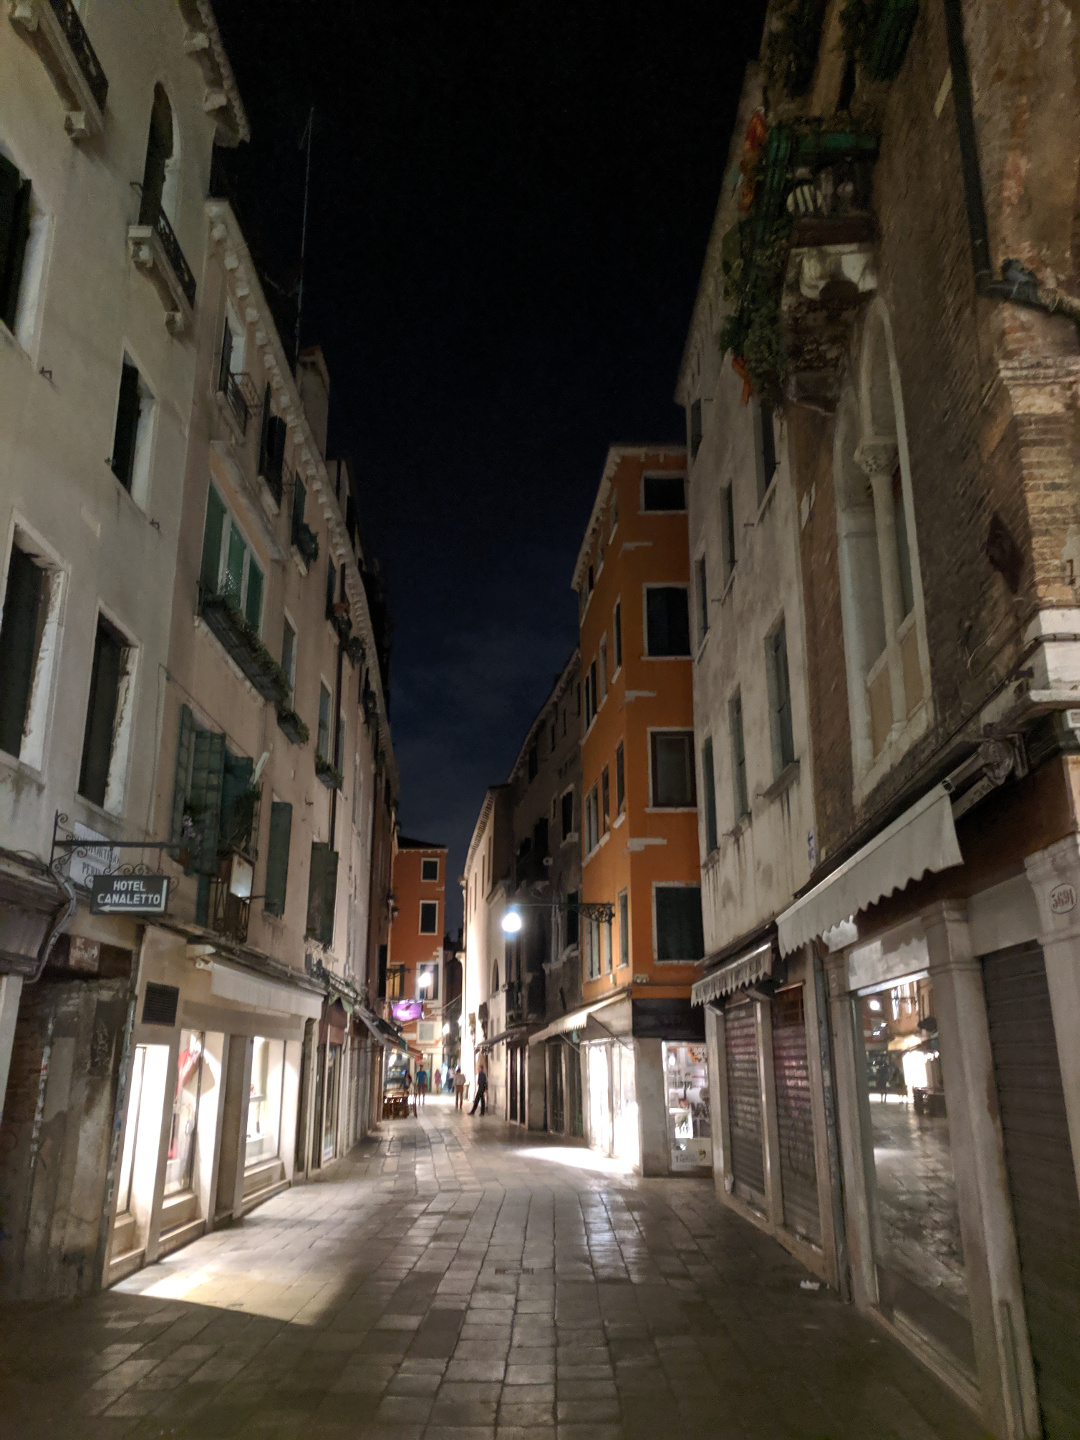
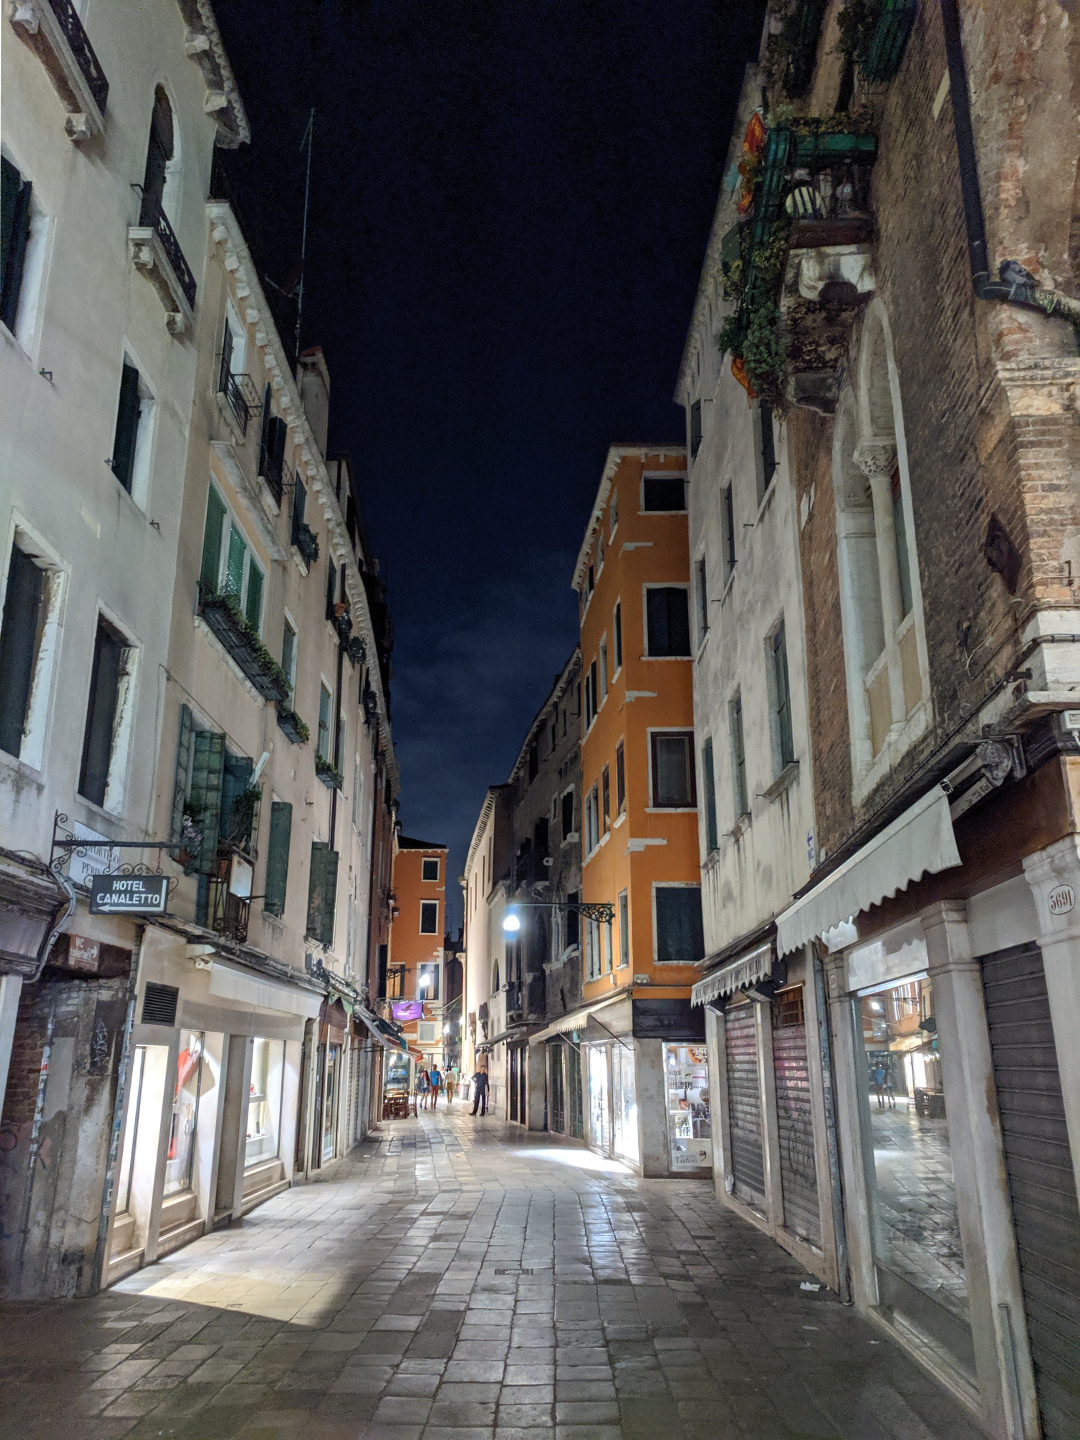
The "Auto" version here is already a serviceable photo. Night Sight did a good job balancing the lighting levels and correcting color. The storefronts are less overexposed and there's more detail across the board. (Some storefronts are really bright in Venice, I'm not quite sure why!)
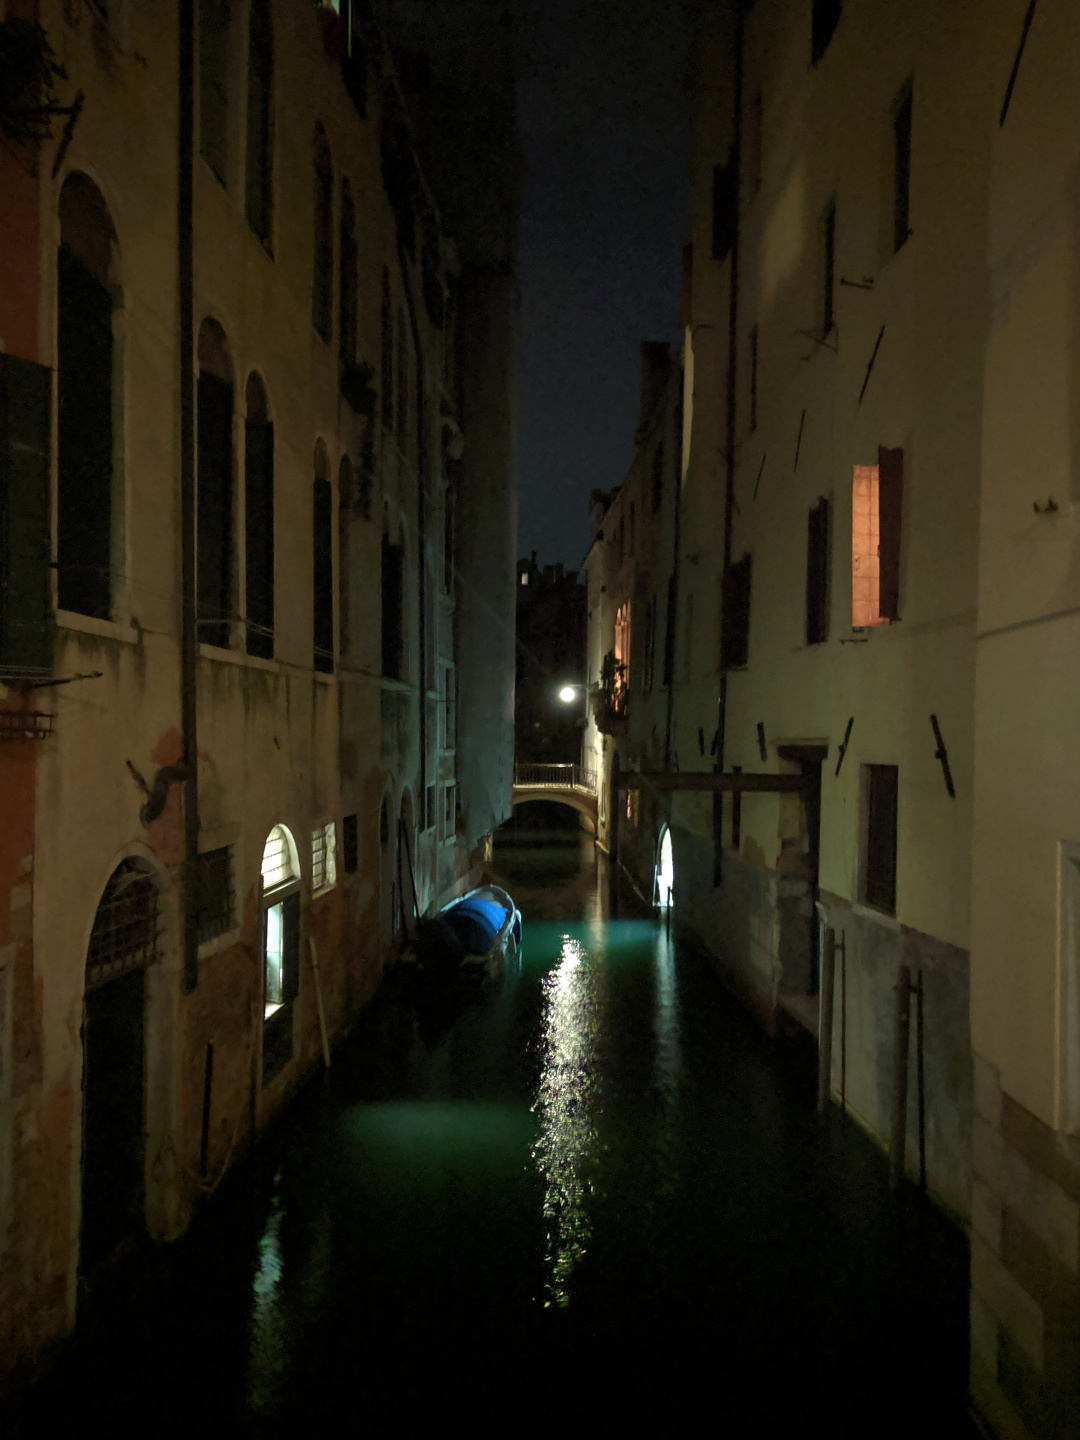
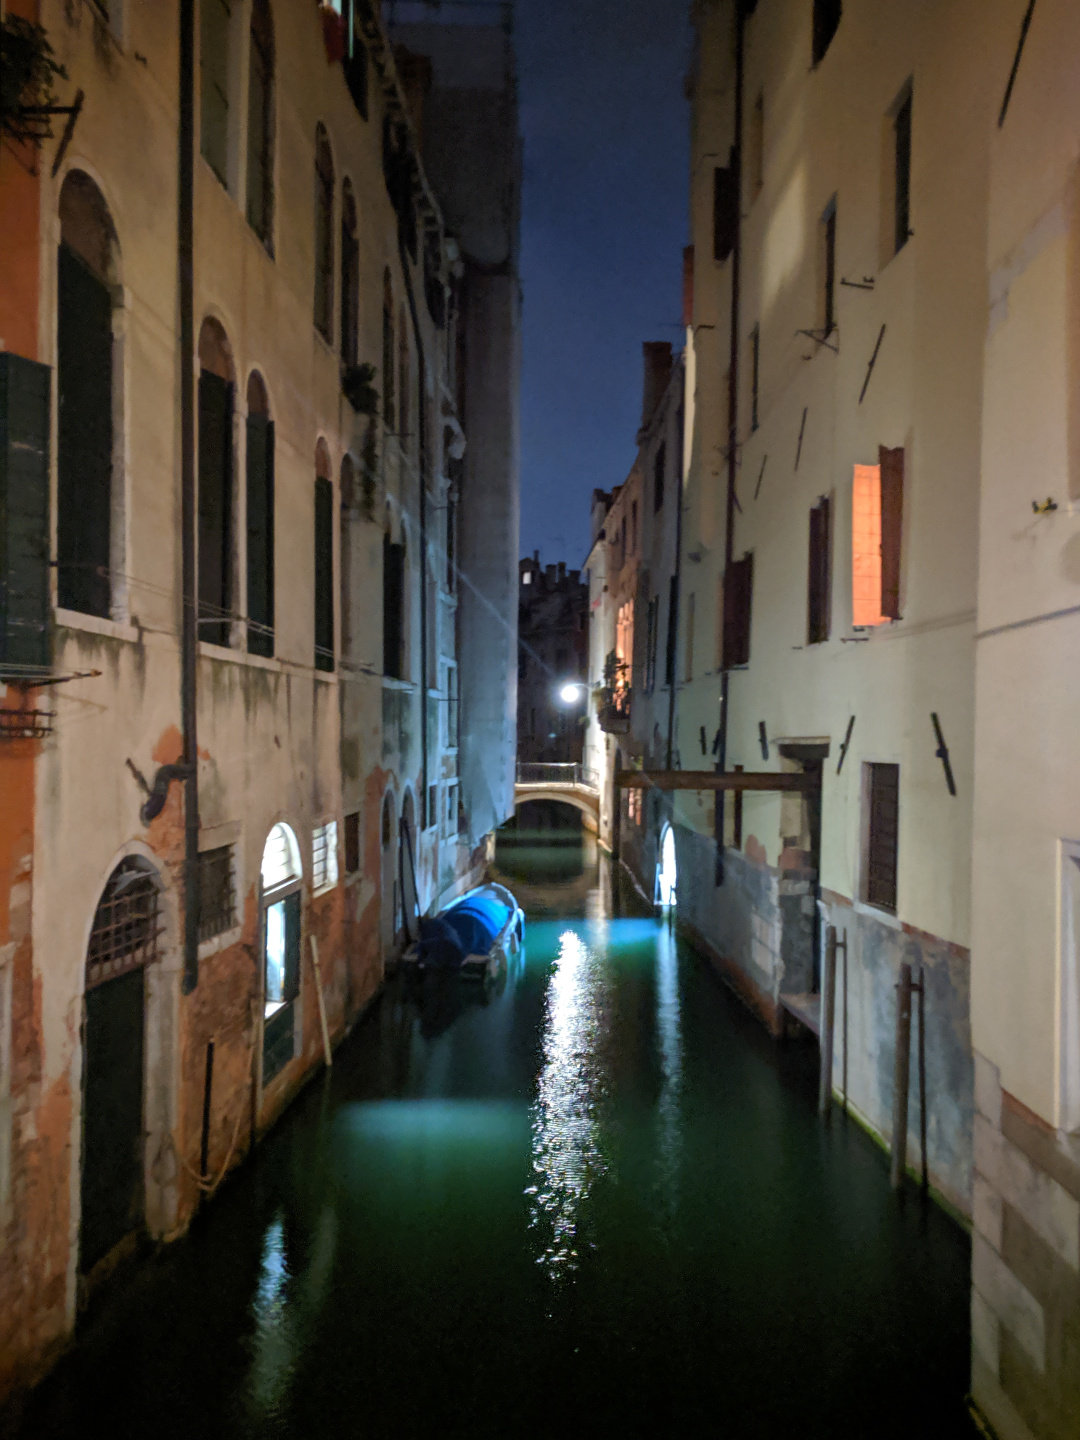
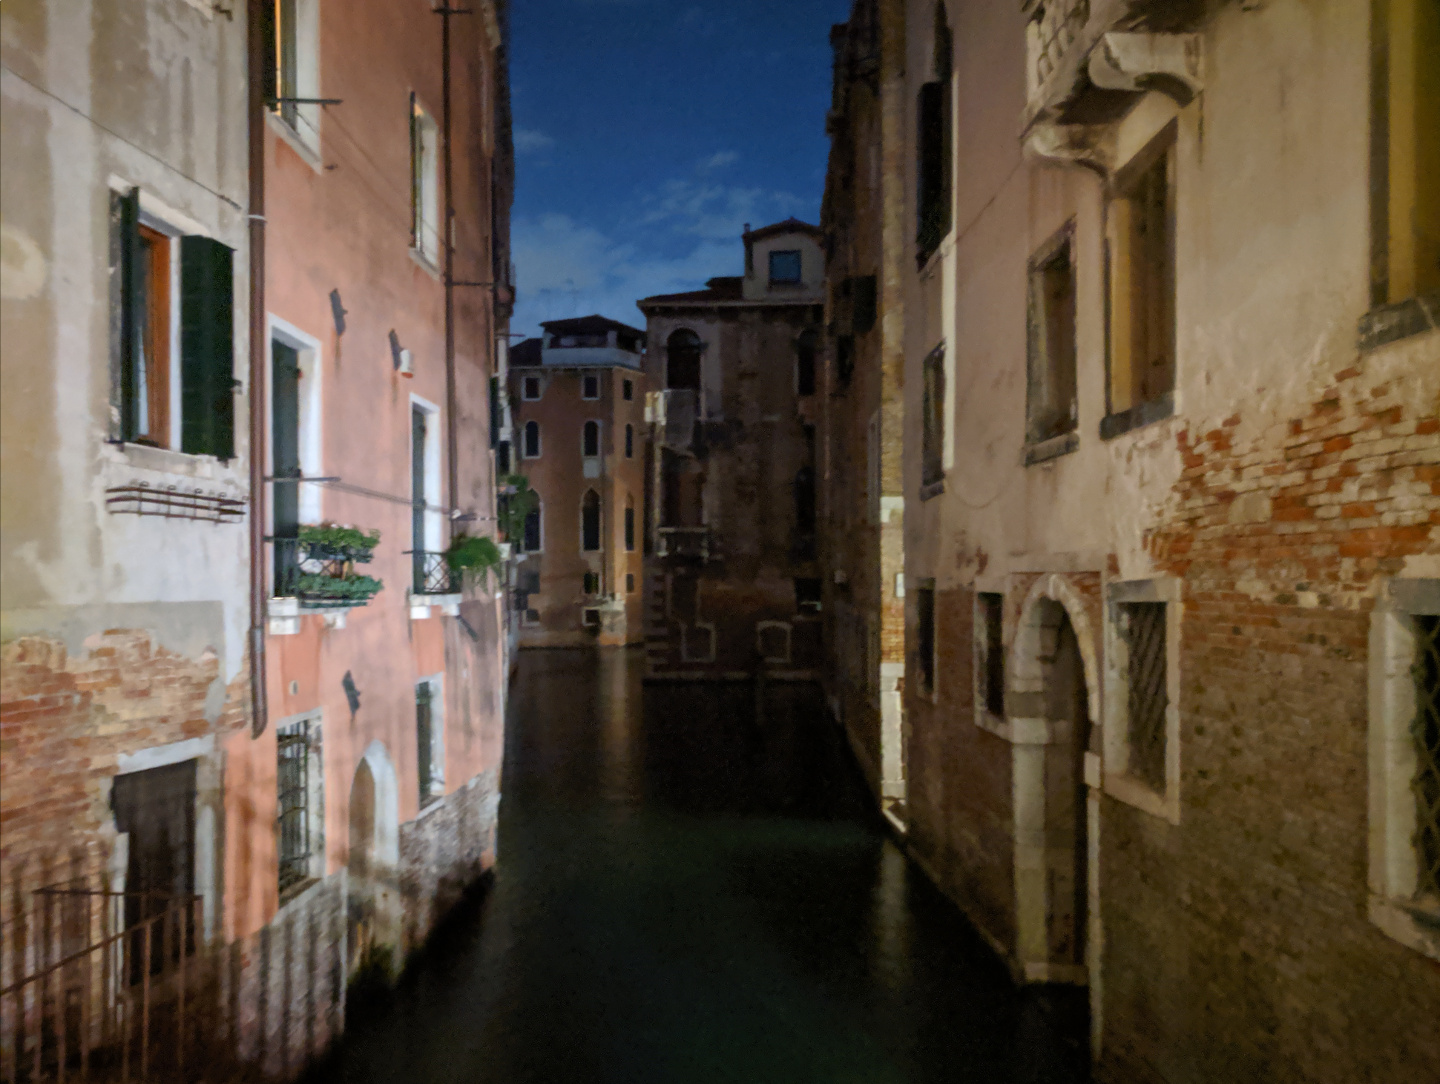
This canal gained some clean brightness on the passively-lit walls and water. The buildings in the back are almost completely undefined in Auto mode. The difference in 'exposure time' can be seen in the reflection in the water, though.
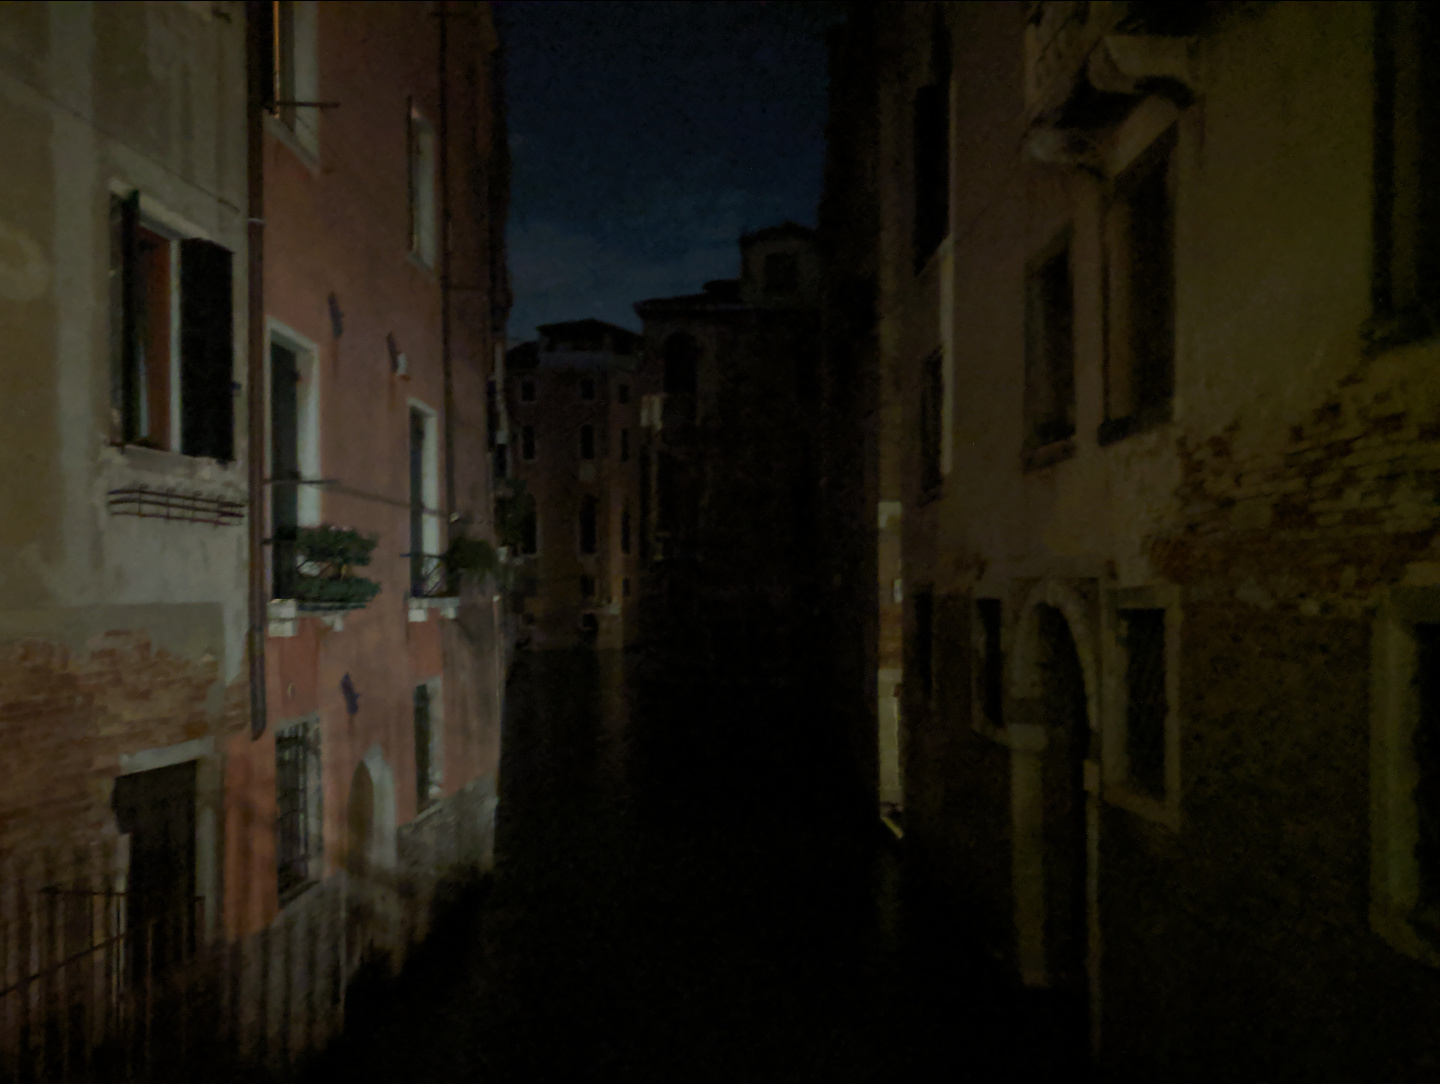
Finally, an example where the "before" is almost entirely unlit, complete with noisy darkness where the water should be, and the "after" just pulls details out of thin air. This is probably the most striking difference of the bunch and isn't even the craziest example on the Internet of Night Sight lighting up a scene all by itself.
After comparing all these photos, Night Sight seems to be great for a few different things:
- Balancing the exposure of different objects in-frame. The algorithm works by taking one normal photo frame and then a series of extra frames to fill in information, and when an area is already well exposed, it doesn't need to be further exposed as much by the followup frames.
- Correcting color. I'm never personally sure what the "best" color is in a photo, but it seems like the algorithm produces more "accurate" colors which is hard to argue with.
- Adding detail to any sections of the shot that started out underexposed. And, to be honest, the rest of the photo as well.
There's also some downsides to Night Sight, but most of them don't show up in the results. Most importantly, a photo will usually take about 2 seconds to take, or more (up to maybe 5 seconds) if it's a particularly dark scene. You can't just snap and move on as easily. Also, movement can blur – this is visible in some of my photos in the form of water ripples.
That's all I have for this time! If you have a Pixel phone, don't be afraid to post your own comparisons online. It's always nice to see just how dark a scene is before Google's algorithms had a chance to fix up all the lighting :)